-8.png?height=120&name=Oneserve%20logo%20(white)-8.png)
Summary
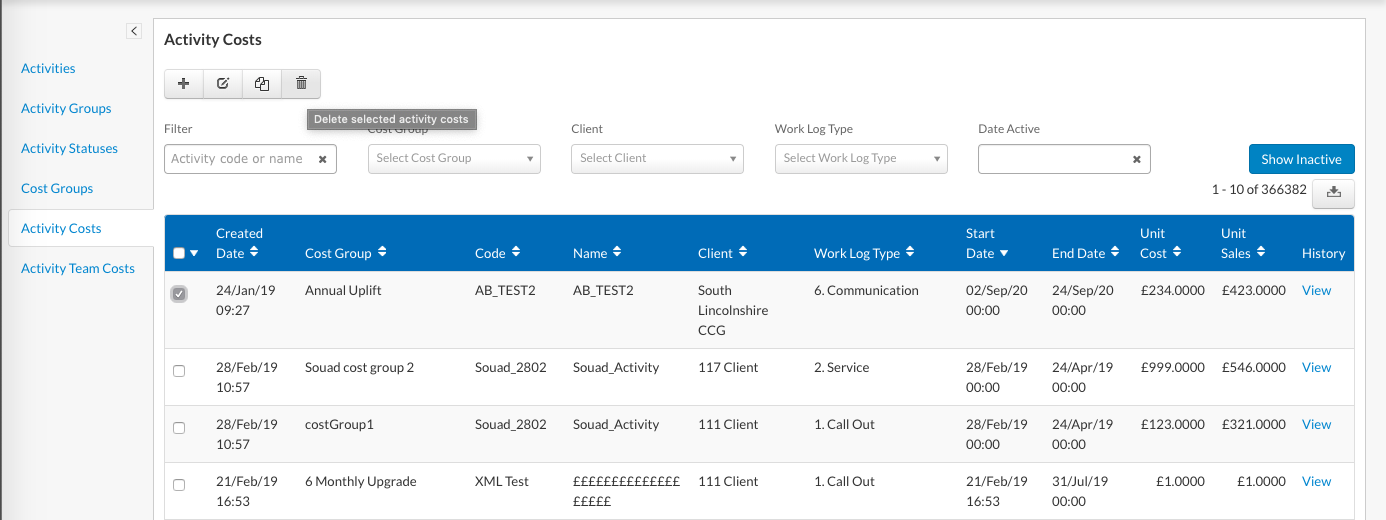
The Activity Costs page gives you the ability to quickly and easily manage the costs against all activities in your Oneserve system. Using the page's built-in search functionality, you can easily edit, copy, and delete costs in bulk. You can also view the full history of the changes made to costs for audit purposes.
Guide
Creating Activity Costs
Activity costs are required before the activity can be assigned to jobs. The costs are created using work log type and client combinations, this provides the flexibility to use different cost values across multiple contracts.
If you have two cost values for the same client, work log type, start dates in the past and both have end dates in the future the job will use the cost from the activity with the newest created date.
By default the table will order costs by the Created Date descending but you can click on the table headers to change the order.
- Click on the + icon under the Cost header

- Fill in the required details for the new costs:
- Work Log Type - Assign the Work Log Types the activity will be available against
- Clients - Assign the Clients the activity will be available against
- Unit Cost - The internal cost value used to populate the Job Cost tab
- Unit Sales - The external cost value used to populate the Job Cost tab
- The Cost and Sale fields are unit price so if the activity default quantity is greater than 1 the cost will be multiplied by the quantity value when the activity is assigned to the job.
- Start Date - The activity can be assigned to jobs created after the start date
- End Date - The activity cannot be used for jobs created after this date
Searching for Costs
The search tools in the activity costs page allows you to narrow down the costs you are looking for by code, name, cost group, client, work log type and the date range in which the cost was active. To use these tools:
- Click on the cog icon in the top right to access the admin menu
- Select Activity Costs under the "Activities" section to bring up the activity costs screen
- Using the search tools along the top, select the relevant filters to return the costs you want to see
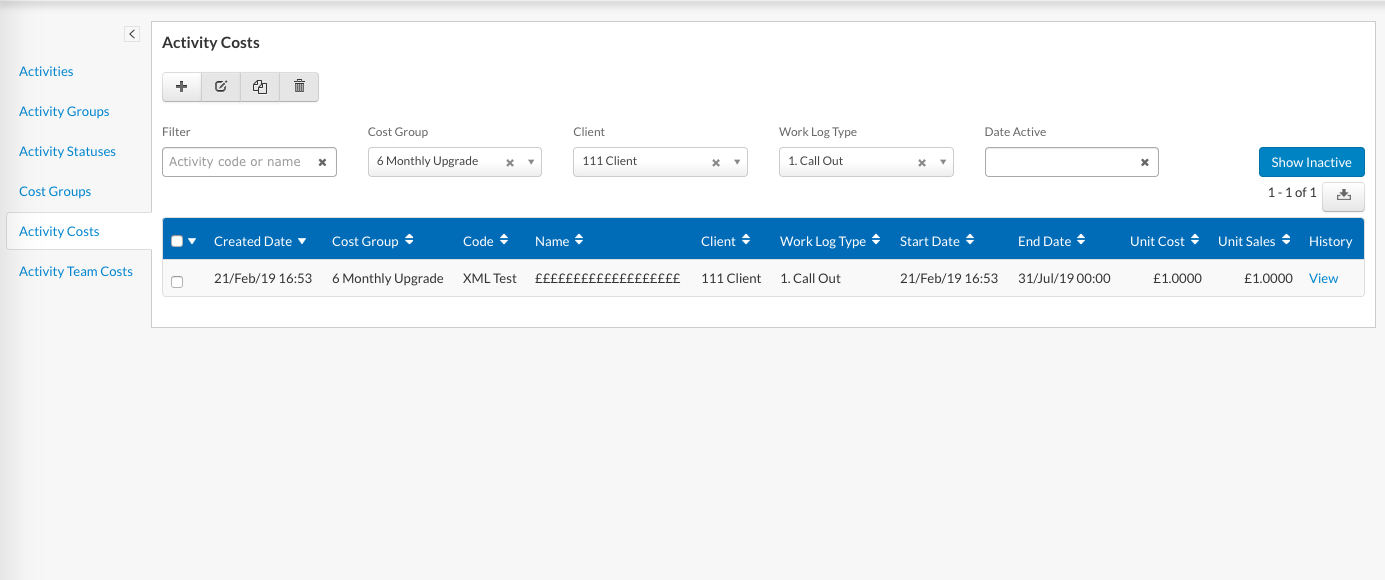
- You can also show costs that have ended by clicking Show Inactive
Editing Costs
Once you have filtered your results, you can start editing costs. To do this:
- Click on the cog icon in the top right to access the admin menu
- Select Activity Costs under the "Activities" section to bring up the activity costs screen
- Select the tick box next to the cost(s) you wish to edit
- Click on the "edit" icon to bring up the edit page
Updating a Single Cost
When updating a single cost, the edit screen will show all information about the selected cost.
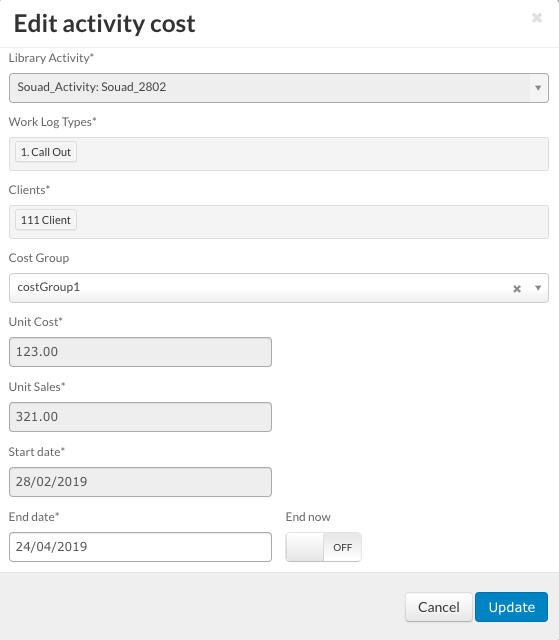
In this menu, you can:
- Select a new Cost Group from the drop-down menu to assign the cost to a new cost group
- Change the end date
- End the cost now to make the cost inactive
Once you have changed the values you want to change, click "Update" to save the changes
Updating Multiple Costs
When updating multiple costs at once, the edit screen will only show the fields which are available for editing.
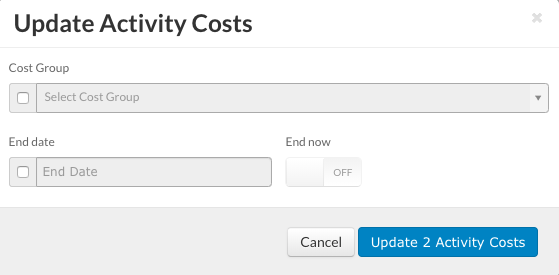
In this menu, you can:
- Tick the box next to "Cost Group" and select a new cost group from the drop-down menu
- Tick the box next to "End Date" to change the end date of the costs
- End the costs now to make the costs inactive
Once you have changed the values you want to change, click "Update x Activity Costs" to save the changes.
Copying Costs
- Click on the cog icon in the top right to access the admin menu
- Select Activity Costs under the "Activities" section to bring up the activity costs screen
- Select the tick box next to the cost(s) you wish to edit
- Click on the "copy" icon to bring up the copy page
Copying a Single Cost
When copying a single cost, the copy screen will show all information about the selected cost.
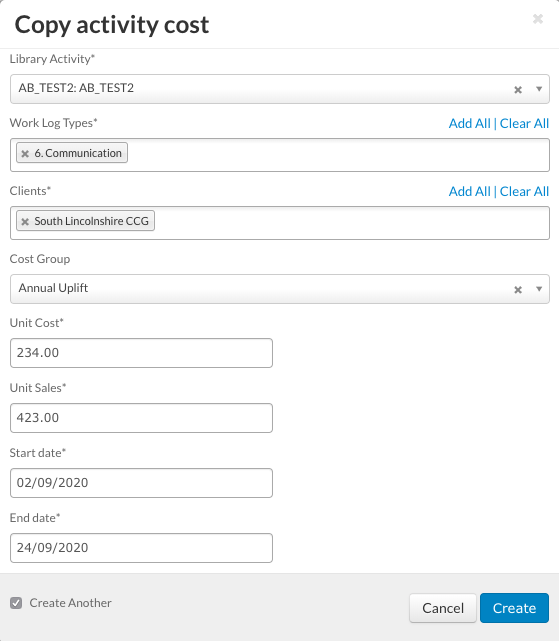
In this menu, you can:
- Select the Library Activity to set the cost against
- Select the Work Log Type(s) the cost should be applied to
- Select the Client(s) the cost should be applied to
- [Optional] Select the Cost Group the cost should be added to
- Set the cost and sales values of the cost
- Set the start and end dates of the cost
Once you have entered these values, click "Create" to create your new cost.
Copying Multiple Costs
Note: If you are copying costs from different Clients and Work Log Types, these values will not be available for editing
When copying multiple costs at once, the copy screen will only show the fields which are available for editing.
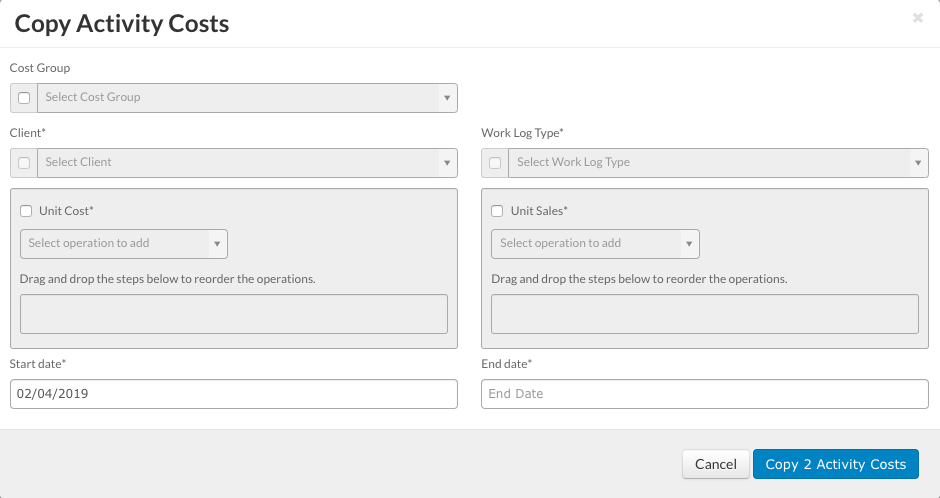
In this menu, you can:
- Click the tick box under "Cost Group" and select the Cost Group the costs should be added to
- Click the tick box under "Client" and select the client to cost should be applied to
- Click the tick box under "Work Log Type" and select the Work Log Type the cost should be applied to
- Set the start and end date of the costs
Bulk Updating Costs and Sales
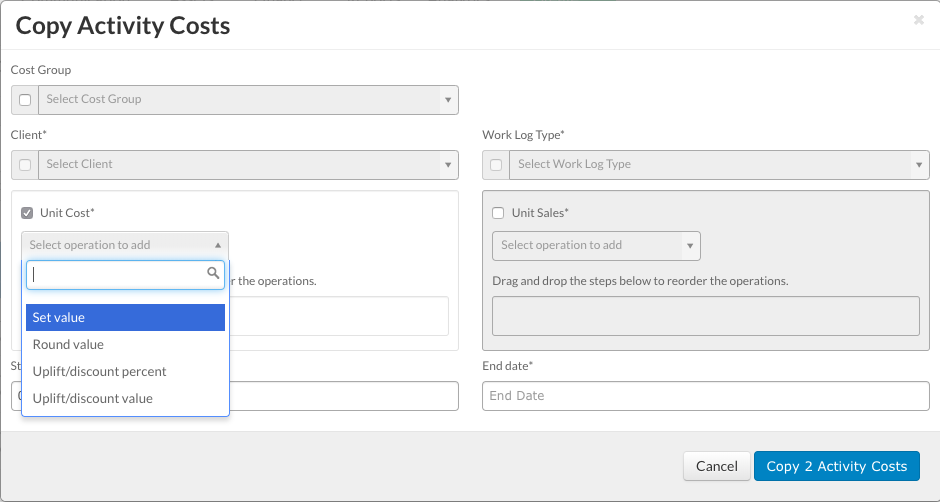
When copying costs in bulk, there are various operations that can be applied to the cost and sales values in order to make uplifts and changes quick and easy. These options are:
- Set Value - Set the new cost/sale at a particular value
- Round Value - Round the value to a specified number of decimal places between 0 and 4
- Uplift/discount percent - Apply a percentage change to the value
- Uplift/discount value - Apply a change to the value of the amount specified
These options can be dragged and dropped into a specific order to carry out calculations as the costs are copied. The result of the calculation will be shown under the calculation to give you an idea of what the changes will look like in real-time
For example, if you wanted to set an uplift of 10% on a cost of £25, you would select the following:
- Set Value - £25
- Uplift/discount percent - 10%
- Round Value - Set to the number of decimal points you wish to round to
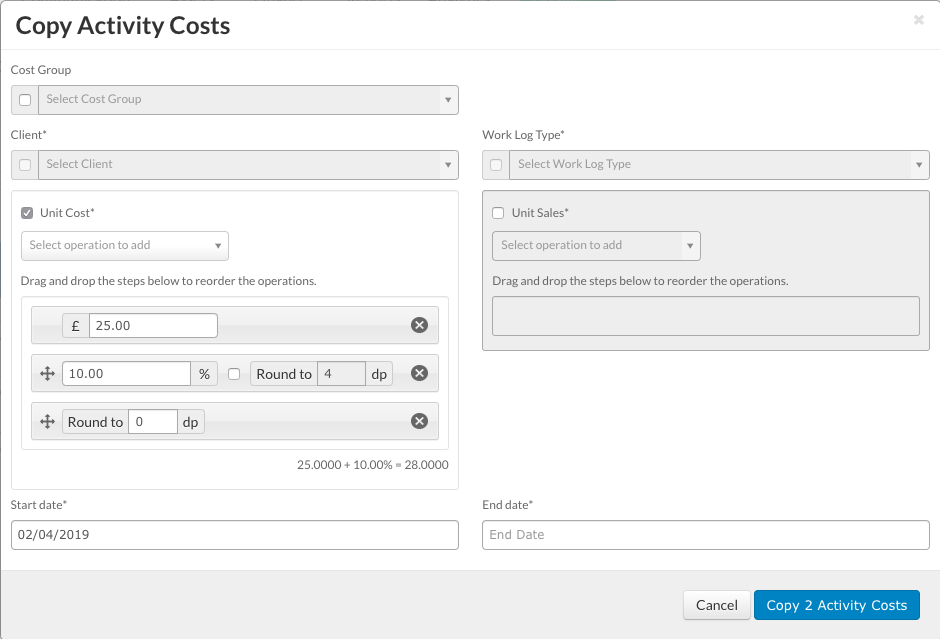
Once you have entered these values, click "Copy x Activity Costs" to create your new costs.
Deleting Costs
Note: Deleting a cost is not the same as ending the cost. Costs can only be deleted if they start in the future and have not been used anywhere else in the system. To remove a cost from the activity costs page and retain an audit trail, use the "End Now" feature instead
If you have created a cost and no longer need it, it is possible to delete the cost provided it has not yet started. To do this:
- Click on the cog icon in the top right to access the admin menu
- Select "Activity Costs" under the "Activities" section to bring up the activity costs screen
- Tick the box next to the cost(s) you wish to delete to select them, then click on the rubbish bin icon
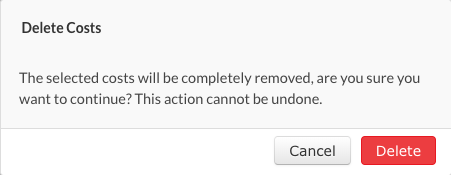
- A box will appear asking if you wish to continue. If you are sure you want to remove the costs from your system, click "Delete". If you are not sure, click cancel to cancel the changes
Note: if any of the selected costs cannot be deleted due to being active, no items will be deleted
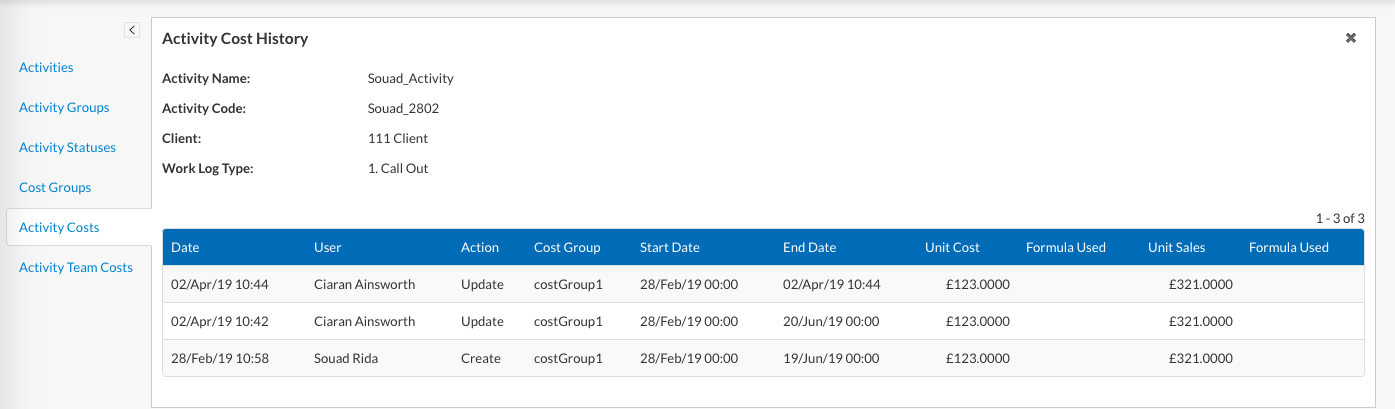
Viewing Cost History
As changes are made to costs, a full audit history will be kept against the cost so that you can easily see when and by whom a cost was edited. To view a cost's history:
- Click on the cog icon in the top right to access the admin menu
- Select Activity Costs under the "Activities" section to bring up the activity costs screen
- Click on View under the "History" column on the right-hand side to bring up the history screen. This will show a full history of changes made with a date, acting user, and summary of the action taken