-8.png?height=120&name=Oneserve%20logo%20(white)-8.png)
Summary
Enhanced Surveys allows you to create complex surveys in Oneserve, including generating PDFs of survey submissions. Contact Oneserve to ensure that you have this feature activated.
If you're not sure if Enhanced Surveys meet your needs, click here.
Creating Enhanced Surveys
You can create your enhanced surveys by going to the Enhanced Surveys section of your settings. If you can't view this feature, please contact your system administrator.
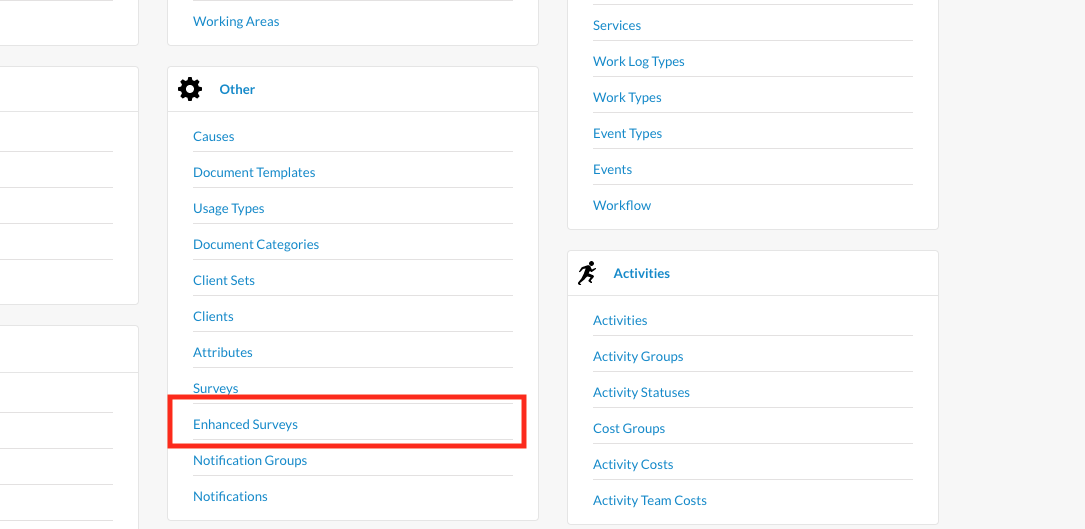
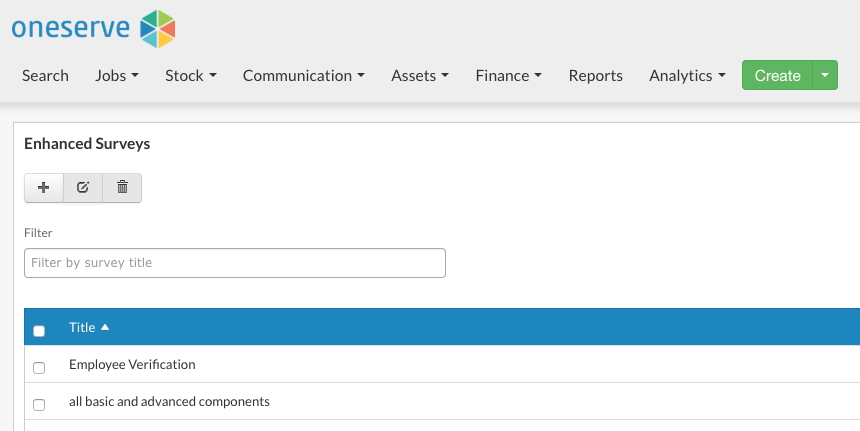
This page will show all of the enhanced surveys you have created so far, you can click on any of them to open/edit each one, or click on add icon to create a new one.
Survey Types
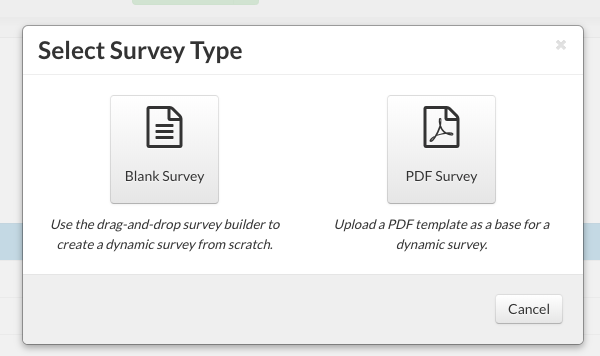
When you create a new Enhanced Survey, you will have the option of two survey types, depending on what you would like to create.
Don't worry, this decision isn't final, you can switch your survey type at any time after you have created it.
You can add, remove and edit as many components to the survey as you require.
Switching Survey Types
You can change the survey between the different survey types at any point by changing the Display As option to the survey type you want.
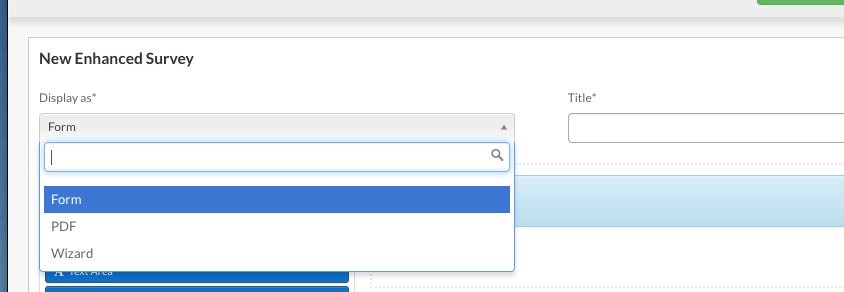
Note: If you are creating a PDF survey, you will need to switch the survey type to Form to ensure that your operatives still only complete a list of questions rather than viewing the PDF itself.
Adding Components
Once you have selected the Survey Type you want, you can start constructing the survey as required. Simply click and drag the different components you want to add to the survey into the available space. You can drop the components in any order you want.
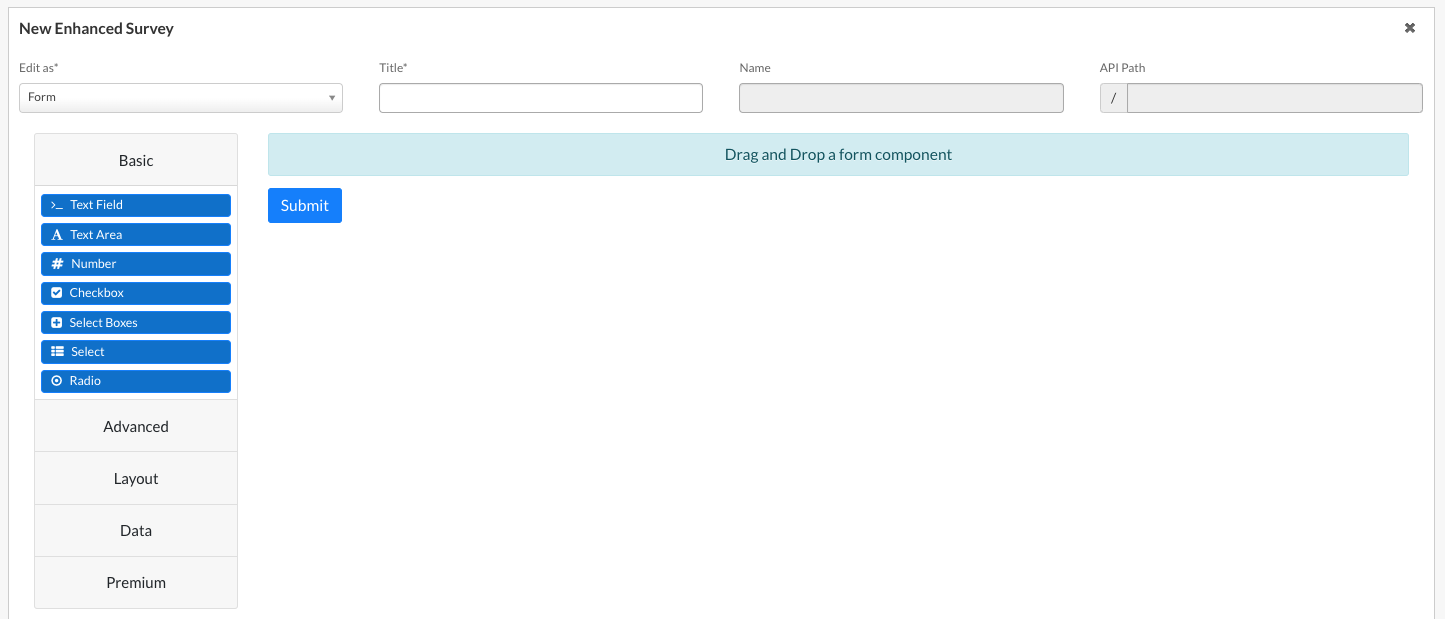
Component Types
- Text - Short and general text input.
- Text Area - Text input which requires multiple lines
- Number - Only allows numbers to be entered
- Checkbox - A simple box that is either ticked or un-ticked
- Select Boxes - Allows users to select multiple values as tick boxes
- Select - Creates a drop-down list of options
- Radio - Allows users to select one of multiple options
- Email - Can be set to specify that only a valid email can be entered
- Phone Number - Can be set to specify that only a valid phone number can be entered
- Date/Time - Can be used to input dates, times, or both
- Day - Shows a calendar that allows users to pick a day
- Time - Allows users to select a time
- Currency - Displays a number in currency form
- Signature - Allows users to fill in a signature
- Content - Allows you to add text and images to the survey
- Columns - Allows you to display components in columns
- Panel - Allows you to display components in sections
- Data Grid - Allows you to let users add multiple responses in a section
- File - Allows users to upload files (such as images) to a survey
Some components have to be set up in a specific way in order to work as intended.
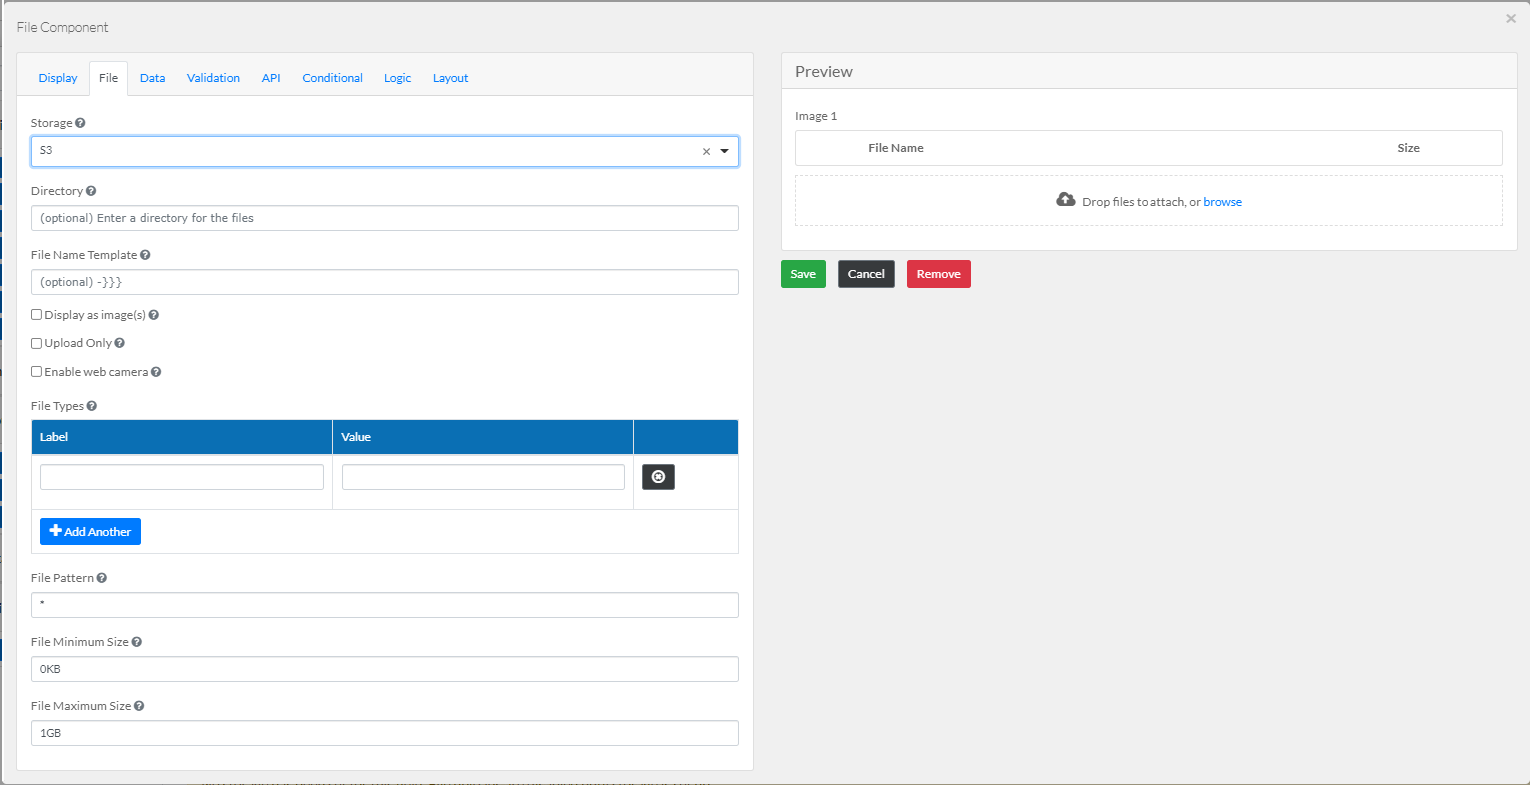
File Component
The File component allows mobile operatives to upload files, including images, as part of completing a survey. To ensure the image gets uploaded and displayed properly. In the File tab, select S3 for the Storage, and select 'Display as Image(s)' checkbox to make sure the uploaded files show as an image on the submission results.
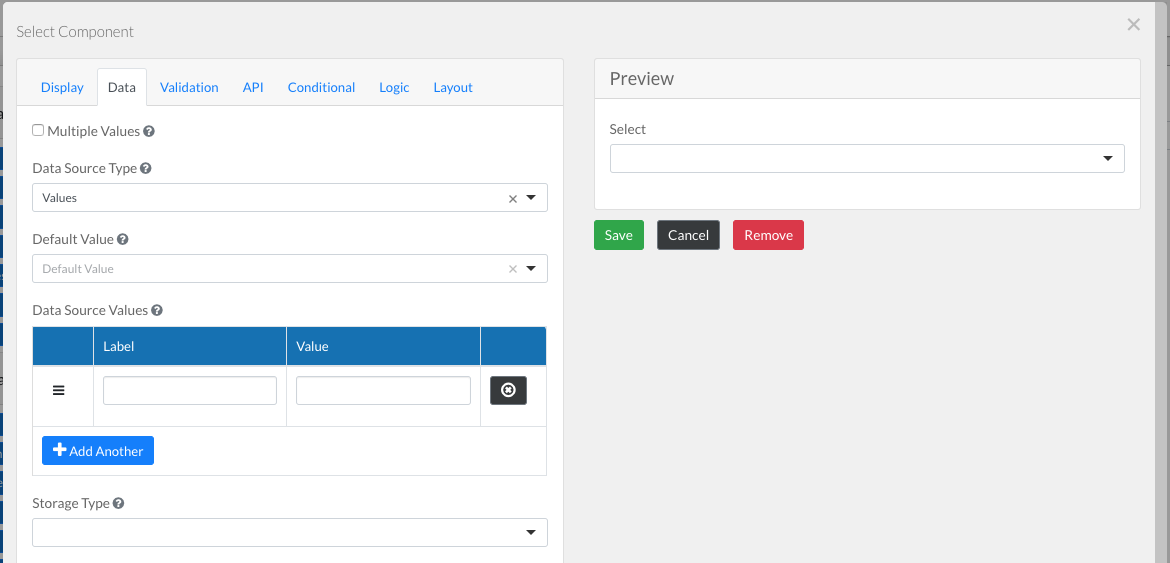
Select Component
The Select component allows users to select multiple values from a drop-down. You can specify the available values from the Data tab of the component.
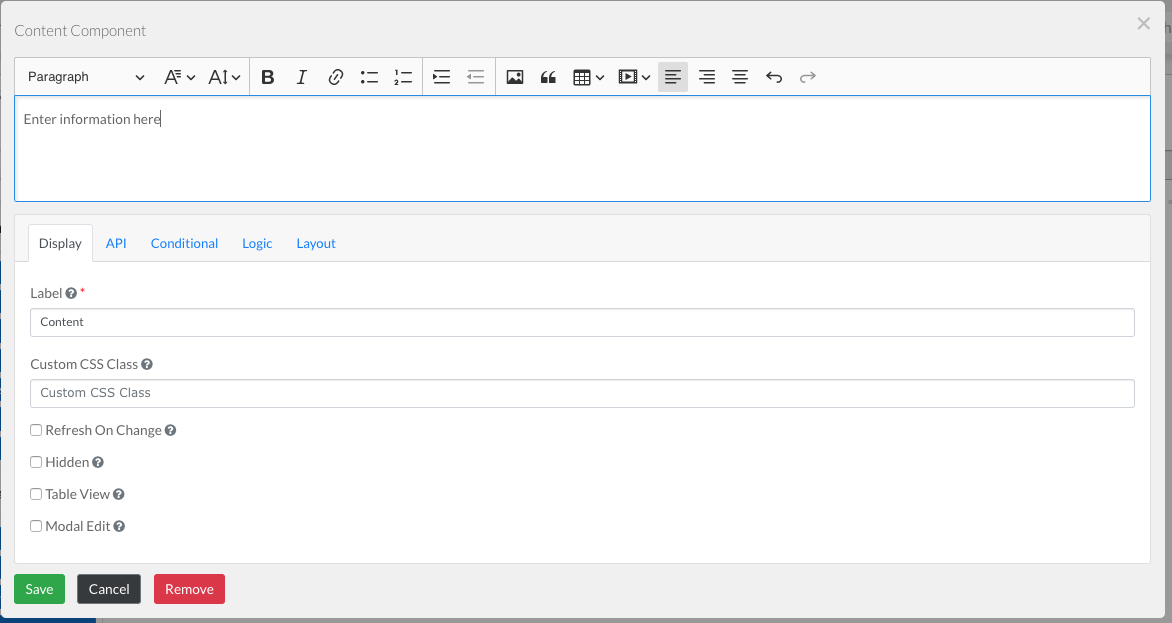
Content Component
The Content component allows you to add text and images to the survey, when you are adding this component, you don't need to change any of the information in the Content Component window, just create the component then add the relevant text directly into the text area.
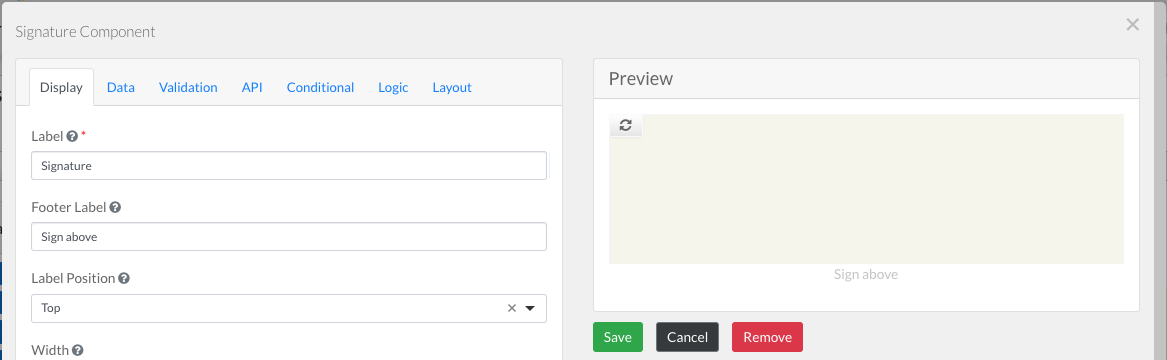
Signature Component
The Signature component allows users to enter signatures as part of a survey. This component does not display the Label above the component and instead displays the Footer Label beneath the component. You can change this information in the Footer Label field of the Signature Component window.
Editing Components
Once you have added a component to the survey, you can edit by clicking on the edit icon to the right of the component you want to change.

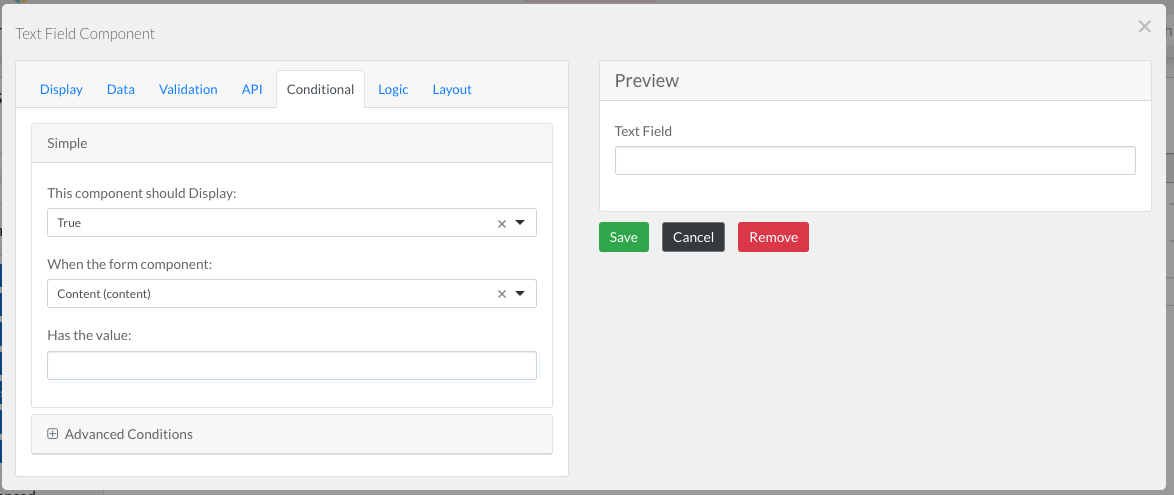
Conditional Components
You can set any component's visibility to be conditional (i.e. displays depending on the response to another item on the survey), by opening the component and going to the Conditional tab. You can then follow the simple wizard to choose the criteria for when the component should display.
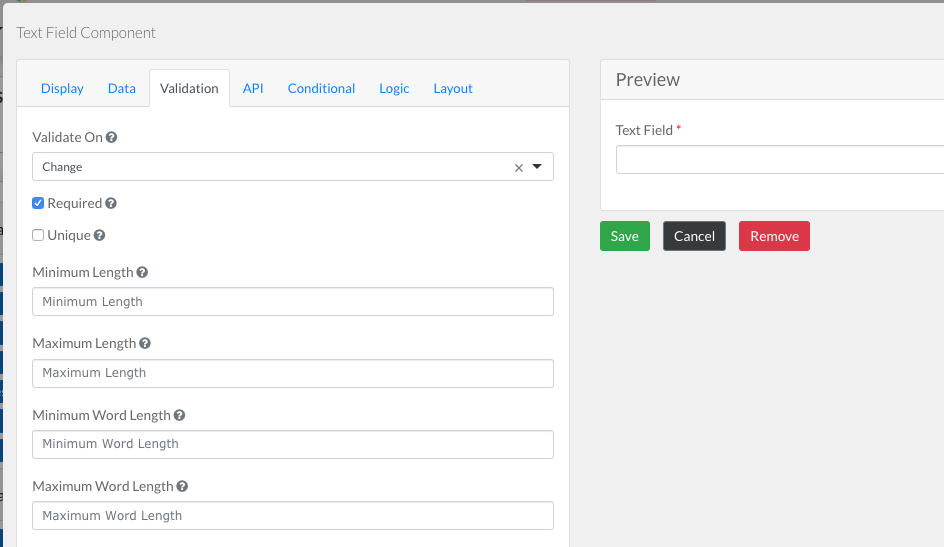
Mandatory Components
All components are optional unless you specify that they are required. You can do this by opening the component, selecting the Validation tab, and ticking the Required checkbox.
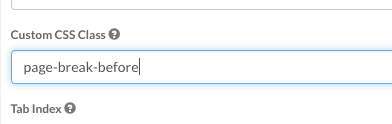
Page Breaks
You can choose where you want a page break to be in the PDF of a submission by entering page-break-before in the Custom CSS Class field of any element. This will ensure that the element starts on a new page, but will not affect how the element displays on the mobile app.
Testing Surveys
You can test how your survey will look and behave at any time by switching to the Test tab. You can then complete the survey as if you were on a mobile device.
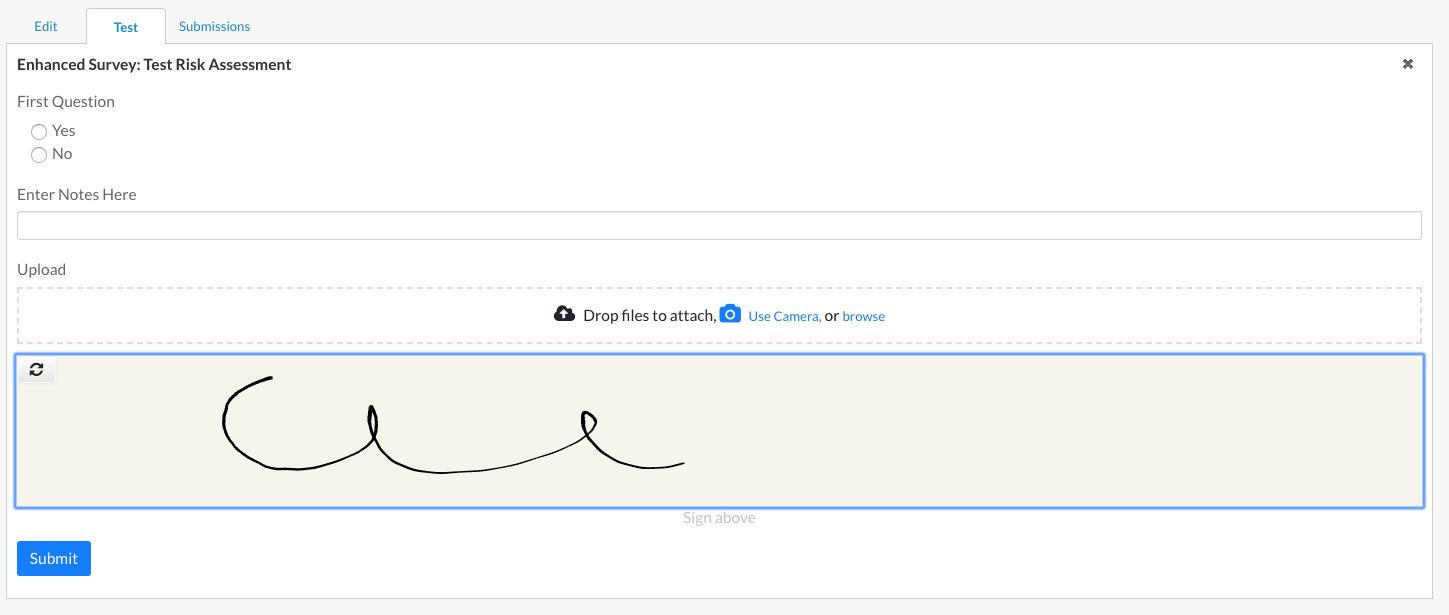
Any information entered in this page will not be stored anywhere, so you can use it as much as you like.
Creating/Saving Surveys
Once you have entered the components you want, you can create the survey by clicking Create. If you are editing an existing survey, this button will display as Update, this will save and close the form. If you close the form without clicking this button, your changes will not be saved.
Adding Enhanced Surveys To Work Types
To add an Enhanced Survey to a Work Type, go to the relevant Work Type in Settings and open the Enhanced Surveys tab.
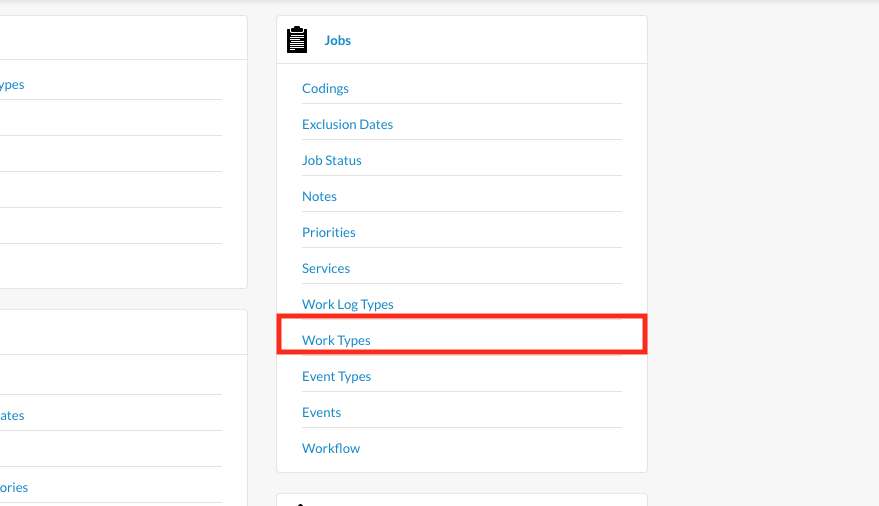
Select the relevant Work Type and click on the Enhanced Surveys tab
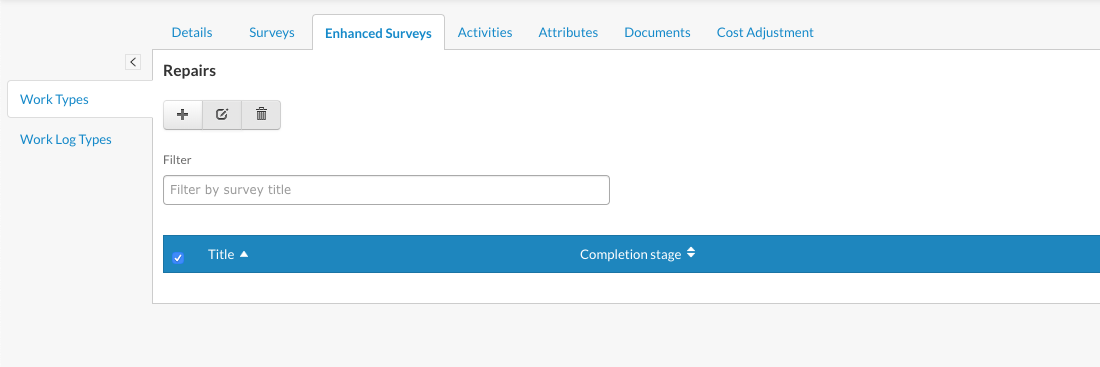
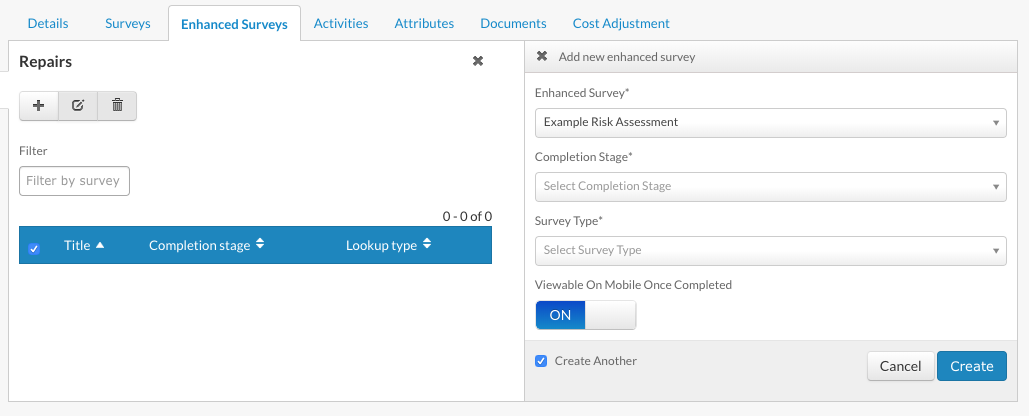
Click Add then select the Survey you want to add plus key behaviour.
The survey will then show up on the next job created against that Work Type.
Completion Stage
By setting the Completion Stage to Optional, you can specify that the survey can be completed any time within the appointment but does not need to be completed in order to complete the appointment itself.
Completing Enhanced Surveys on Oneserve Mobile
Enhanced Surveys are viewed and completed from the 'Surveys' section of every appointment on Oneserve's Native Mobile App
Once an operative has pressed Submit the survey results will be posted against the job and against the submissions tab of the survey
Viewing Survey Results
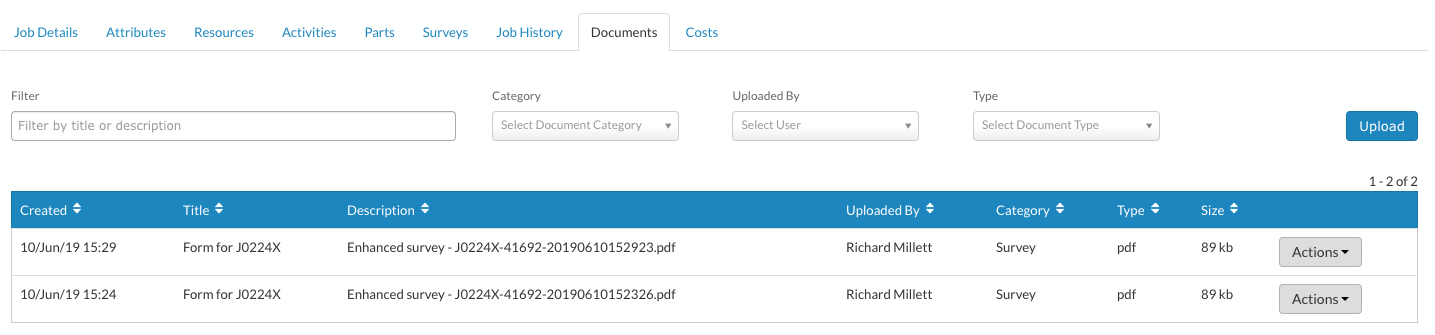
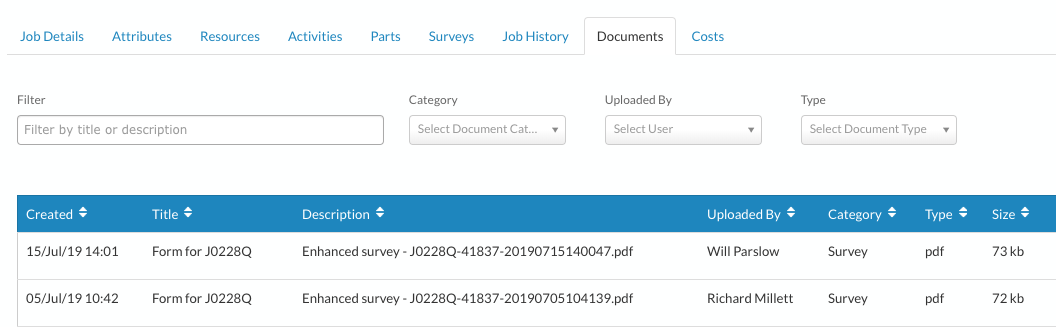
Users can access survey results from two places, either from the Documents tab of the relevant job, or from the Submissions tab of the relevant Enhanced Survey.
Survey Results in Jobs
Submitting a survey generates a PDF file that is automatically stored against the Documents tab of the relevant job. You can see the key information about the survey such as when it was posted and which user submitted it.
Survey Results in Submissions
You can see and edit any survey submissions by opening the relevant Enhanced Survey in the Enhanced Surveys section of your settings.
Select the relevant survey and go the Submissions tab.

You can either open and edit a submission (doing this will overwrite the original submission and post a new PDF certificate to the relevant job). Or select any/all submissions to download or delete them.
You can filter the submissions by resource or job ref.
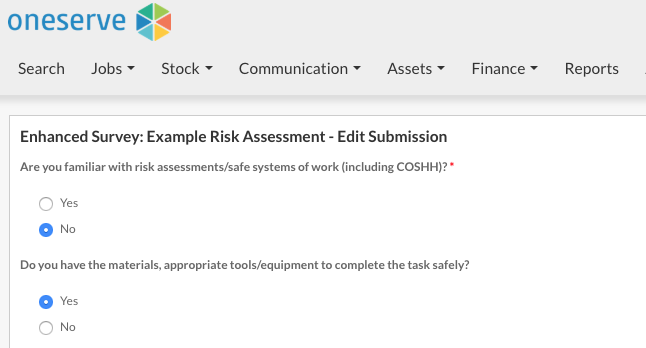
Editing Results
To edit the results of a survey, double click on the relevant submission, this will display all the information entered in the survey. Once you have made the changes you require, click Submit and the changes will be made.
When you make any changes, the system will automatically post an updated PDF document against the relevant job with your user details as the owner of the document
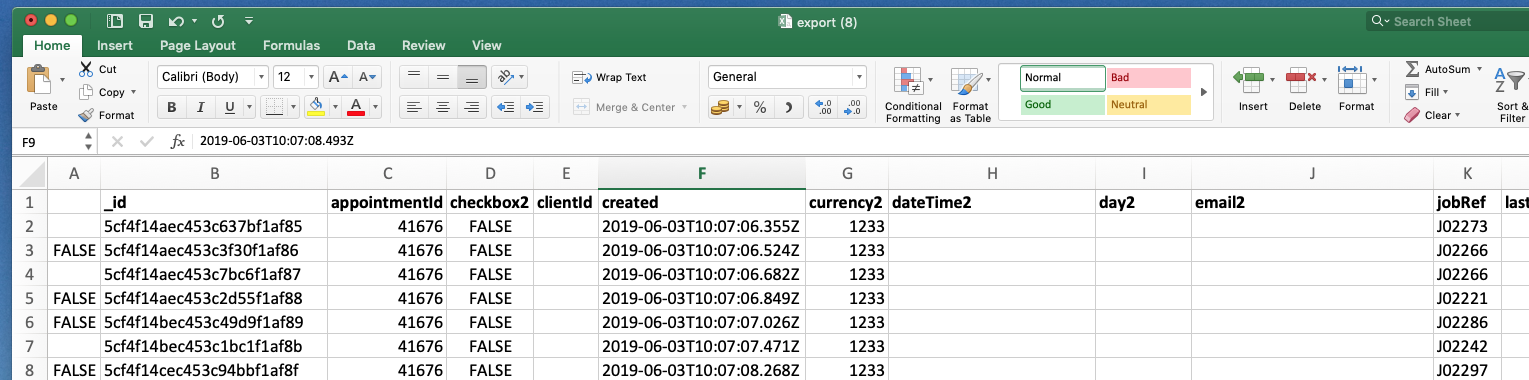
Exporting Results
To export survey results, select the submission(s) you want to export and click on the Export icon on the right hand side of the screen. This will export the relevant submissions as a .csv file.
When you export results, you will be able to see both the submission information as well as key oneserve information such as:
- Resource Name
- Job Ref
- AppointmentID
- Team
- Submission date/time
You cannot currently view Enhanced Survey submissions in Analytics.