-8.png?height=120&name=Oneserve%20logo%20(white)-8.png)
Prerequisites
You need to add your parts to Oneserve before you can use Purchase Order and assign your current stock levels. The parts page will record the information for part number, description and cost. Parts can be assigned to jobs straight from your current stock levels or you can request a part to be ordered using the purchase order page. Once a part has been assigned it will add a cost/sales value to your job so you can pass the cost onto the customer or use the internal cost for overall job margin/profit.
User Type Right: Parts [SMCPL] and Part [ADD_PART] -
The parts page will be available in the stock menu, if you do not have this option you will also need the rights for Stock [STOCK] and Stock [SMP]
Searching for a part
1. To search for a part you can either search by category using the "Part Category" drop-down menu.
- To search for a part you can either search by category using the "Part Category" drop-down menu.

- Alternatively, you can type in the part number of the part you are looking for in the box labelled "Filter".

Adding Parts
- To add a new part first click on the add button [+], this will open up a new form which is used to input the data on the new part.

-
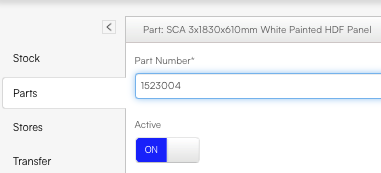
P/N - This is where you put the part number.
-
Description - in this box you can put in a description of what the part is and any other important pieces of information about the part.
-
Cost and Sales Cost - allow you to input the cost of the part to you and the cost you sell it at.
-
Reorder Level and Reorder Qty - "Reorder Level' allows to you set the limit you want your stock to get down to before reordering. "Reorder Qty" allows you to set the amount of these parts to reorder.
- Category - a drop-down menu that allows you to set the category. If you require a new category please raise a ticket with the support team.
-
UOM - allows you to set the unit of measure that will be used with this part.
-
Services - you can select the that relate to the part using the drop-down menu.
-
Preferred Vendor - allows you to select the preferred vendor of the part.
-
To finish creating the part press [ Create] if you want to create several parts in succession you can click on the tick box labelled "Create Another", this will allow you to create another part after the current one, highlighted in green on the screenshot below.
-
To cancel the creation of a new part just press "Cancel".

Editing Individual Parts
- To edit a single part simply click on the part from the parts list.

- This will open a form that is similar to the form used when creating a part. When you're finished press [Update] to save your changes.

Editing Multiple Parts
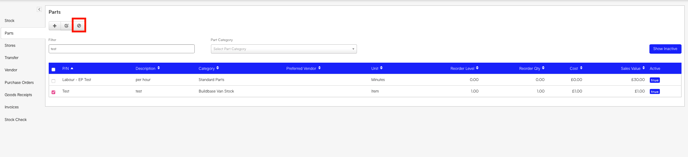
- To edit multiple parts first you select the parts you want to edit using the tick boxes (highlighted in green below) then press the edit button (highlighted in red below).

- After you've pressed the edit button you will see a form that is similar to the form used when editing individual parts, the only difference is there are tick boxes at the side of each box, these tick boxes are used to allow you to change multiple parts at the same time, for example, if the reorder quantity of three of the parts had changed then you could select those three parts, press the edit button and then using the tick box that is next to the reorder quantity and change all of the selected items at once.
- To achieve this click on the tick box that is next to the box you want to edit (This will change the colour of the box from grey to white, indicating you can edit the contents of the box). Then click update (highlighted in red below).

Activating/Deactivating a Part
Note: You can only deactivate a part if it is not allocated to a store. You will need to remove the part from the store before deactivating it.

Activating a part
1. Select the show inactive part button