-8.png?height=120&name=Oneserve%20logo%20(white)-8.png)
Summary
Working/Non-Working Time is set against the Resource/Team calendar to determine the normal working hours and days.
It is used to manage differences to the normal working pattern. For example: sickness and holiday.
You can update Working/Non-Working Times in either the Team or Resources section. If you update the Team details the changes will apply to every resource in that team. If you update the Resource details the changes will only apply to that individual.
User Type Rights
- Teams [SSM] - Access to the Team/Supplier admin page to add/edit/remove Teams/Suppliers, manage team services and working/non working time.
- Teams - View Resources [VIEW_TEAM_RESOURCES] - Access to the resource tab on the team.
- Resources - Edit Working Times [EDIT_RESOURCE_WORK_TIMES] - Access to the Working/Non Working time tab. This tab is used to book resource's holiday, training, sickness, etc.
Guide
Add Working Time to Calendar
- Select the Cog icon to open the Admin menu
- Select Resources under the Team section
- Select the relevant Resource
- To add a record select the Working/Non-Working Times tab
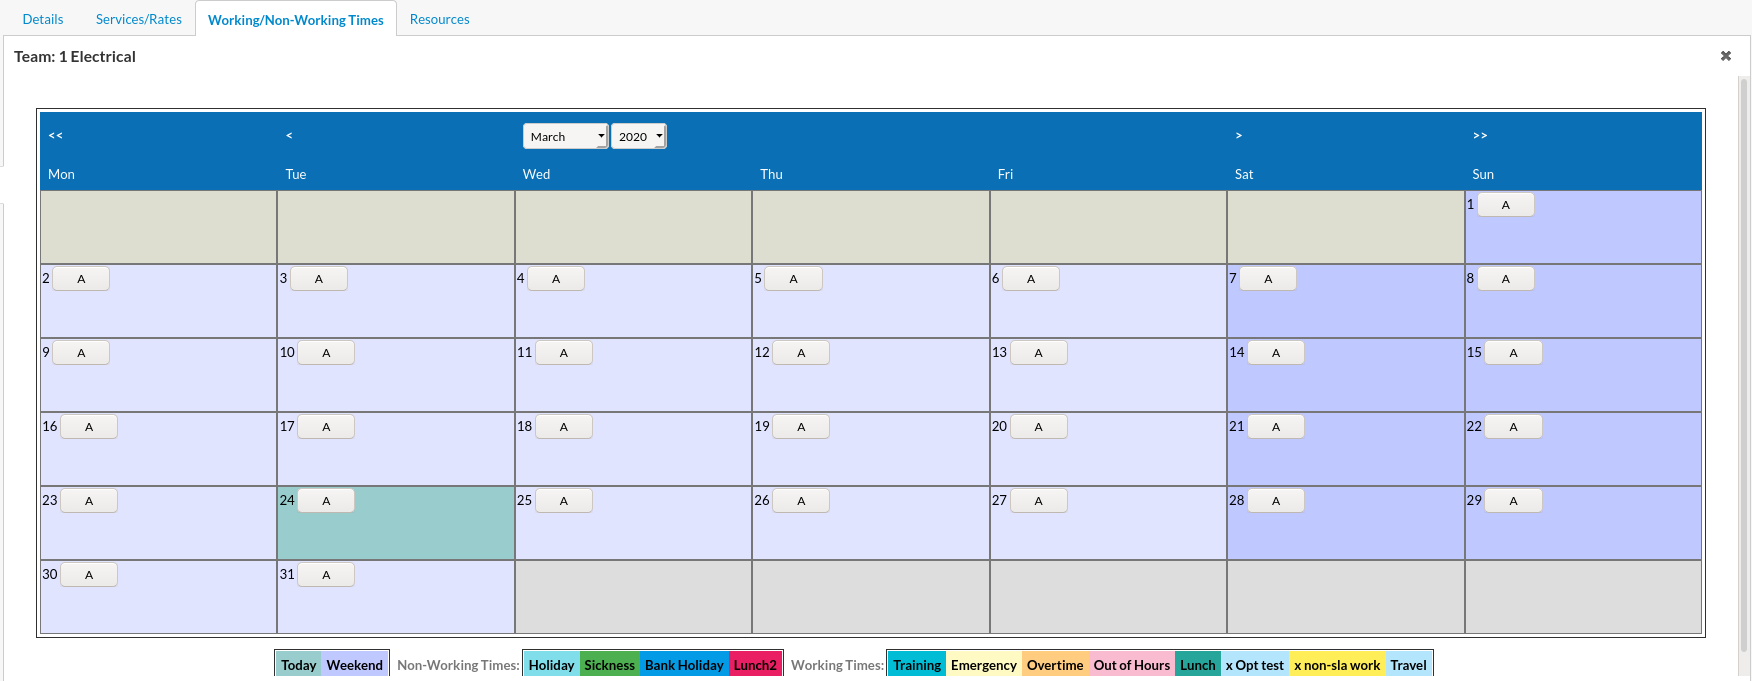
- Click the A on the day that you wish to create the record and fill in the details as follows:
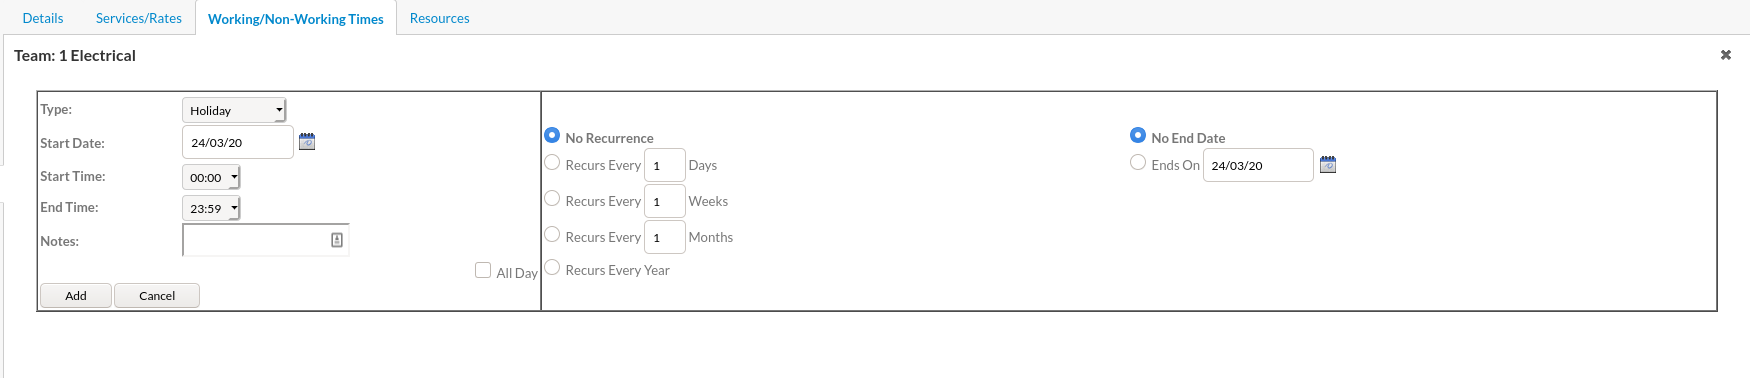
- Type - Select the Type from the drop down. If a suitable Type is not available you can create a new Type using the Holiday Type page. If it is your first time using the Type field it is worth checking the Allocated Time Types page first to see if it is set to Working Time or Non Working time. Non Working time will stop any appointments being booked into the slot e.g sickness/holiday, while Working Time is used for overtime/emergency coverage because you can still allocate an appointment into the time slot.
- Start Date, Time and End Time - Add the Start Date for the Working/Non Working time. The Start and End Time defaults to 00:00 and 23:59 for a full day, please amend as required.
- Recurrence - Select the appropriate Recurrence time. For example, if they are having a week off, select recurs every day and then on the right hand side change the End Date.
- End date - On the right hand side select the day you need the recurrence to stop.
- Notes - Add any notes about why you are extending the calendar.
- All Day - You can tick this box if it is an all day event.
- Click Add
- To amend the record, click on the pencil icon to go back to the update screen, or use the dustbin icon to delete the record.
Note For information on how to manage emergency and overtime please see Out of Hours Work section
Conflicting Appointments
If you create a Non-Working Time record and there are appointments already booked a warning will be displayed once the record has been created.
- Click on the Resolve Conflicts button to be taken to the conflicting appointments screen. This will enable you to manage the appointments. This menu can be found under the Jobs menu
- If the displayed appointments are highlighted white they can be automatically rescheduled by clicking on the Auto-reschedule button
- If they are highlighted any other colour then they will need to be manually rescheduled. Click on the job to be taken to the details to reschedule it manually