-8.png?height=120&name=Oneserve%20logo%20(white)-8.png)
Summary
Work Type is the centre for job configuration so it is important to consider how many work type you would like to create and what each one will need to do.
When creating a job in Oneserve, after the WorkLog Type is selected (see Work Log Types), the system assigns a work type to the job, which then determines a number of aspects of the job, the job details are automatically selected depending on the information you use.
Work types are associated to a number of other configurations:
A visual diagram of the configuration can be found under Work Type Mappings.
Note:- Before Starting to create the work type the Work flows will need to be created.
User Type Rights for the main Work Type page:
- Work Types WEL
User Type Rights for the different tabs available on a work type:
- Work Type - Survey Tab WTST
- Work Type - Activities Tab WTACT
- Work Type - Attributes Tab WTATT
- Work Type - Document Tab WTDTR
- Work Type - MOV Tab WTMOV
Creating a new Work Type
- Select the Cog icon to open the Admin menu.
- Select Work Types from the Job menu.
- If you have already created a Work Type it will be displayed in the list view.
- Click on plus icon to create a new Work Type

5. Complete all relevant fields on the work type form
Order: will determine where it will be displayed in the work type list.

Add appointment resolution notes to job - If this setting has been activated the notes entered by the mobile operative will appear in the work description field on the job details tab.
Signatures - Operative and Customer signatures can be captured on the mobile device, if they are activated they will be mandatory on the mobile application.
Against the signature you can also capture a name against the signature, this will be a free text field which will be mandatory if activated. On the mobile the field for operative name will automatically populate with the first and surname for the logged in user
Signatures and name will be available to view on the job resource tab for the desktop application.

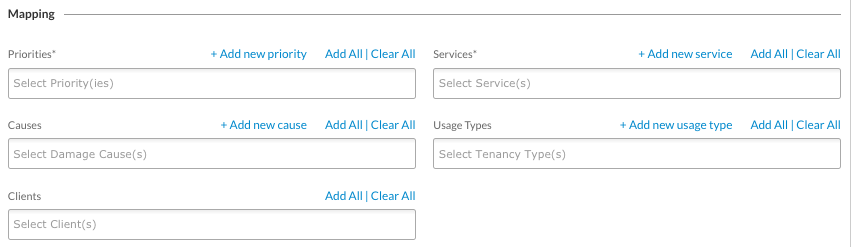
Priorities - Select the priorities suitable for the work type, the priorities will be available for users to select whilst they create the job. The priority will determine the target date of the job.
Services - Services are assigned to activities so you can control what activities will be available per work type. During the job creation process the work log type will be selected followed by the activity, the service on the first activity will determine what work type will be selected.
Services are also linked to Teams and Resources to control what resources will be available to do the job.
Causes - You need to have at least on cause selected. The cause can be set during the create job process, if you currently do not have the option to set the cause on the create job page please create a support request using the help centre
Usage Type - Usage type is a field on the site page so you can control what type of work can be raised on each property. The site usage types can describe the tenancy agreement such as private owned or landlord owned. If the usage type is not ticked it will stop users creating a job against the work type on the create job page.
Client - This field will be useful if you have a client agreement to only deliver work for paticular work streams. During the create job process you select a site, this holds a client which will be used in this functionality. The create job page will determine what work types have the clients assigned using the site client, as your work types are linked to work log types it will affect what options the user will see in the work log type dropdown. This set up will prevent users create jobs for clients where you do not have agreements to deliver jobs of that type.
- This option will not always be enabled, you will need to discuss with our support desk if you would like activate this option.
- The application Setting is called RESTRICT_WORK_LOG_TYPE_BY_CLIENT
If you have this setting disabled dont add clients to the work type. Your create job process will continue to use the relationship between the site usage type and the work type usage type to determine what jobs can be created.
Workflows - You need to select on workflow for the job to follow.The workflow can be the same for Direct and Subcontractor teams or you can create a different workflow.
Default Supplier - When a job is created it usually goes to the first team in the list in a alphabetically order that covers the job service and postcode coverage. Against work types you can set a particular team/supplier to receive the job. EG a void work type will probably go to the Void team instead of the first team available in the list. or more information please go to Default Supplier on work type and site.
Default Priority - If you select a default priority it will be automatically selected on the QJC (Create Job Screen) after you select a Site, Work Log Type and the first Activity. A user will still have the option to select a different priority. If you do not select a default priority it will force a user to select a priority from the list during the create job process
By default the work type will be created with a active status
Editing a Work Type
- To edit a work type, select the Cog icon to open the Admin menu
- Select Work Types from the Job menu.
- Once the work types are displayed select the name to review the details.
- Select the edit icon to make changes to the Work Type details.
- You can add new Priorities, Services, Workflows along with changing existing details.
- To Apply the changes select the update button before navigating away from the page.
Assign Work Types to a Work Log Type.
- The work type needs to be added to the work log types, to do this, select the Cog icon to open the Admin menu
- Select work log types from the Job menu
- Click on the work log type you need to assign the work type to.
- Use the work type box to add in additional work types
- Click on update once the work types have been selected
Related Documents